Tutorial 5: Model Loading with Assimp
This tutorial covers how to load scene data from files using the Assimp model import library.
This tutorial will continue on from the last by extending the previously created code. It is assumed that you have created a copy of last tutorial’s code that can be used for the remainder of this one. As this tutorial, will be loading geometry from file it is no longer necessary to keep any of the previous geometry creation, loading and rendering code.
Part 1: Getting required libraries
OpenGL or SDL do not provide any libraries to assist in loading data from files. To help make things easier we will use the Assimp library. Assimp is a library designed to support loading data from many different file formats in a simple and versatile way.
- To start first download the Assimp development libraries. http://assimp.sourceforge.net/
- Extract the contents of the Assimp include folder into a folder that is accessible by your code (it is suggested to add it to you existing ‘include’ folder). Also, copy the appropriate library and binary files.
Part 2: Loading Scene Files
Assimp can be used to load a variety of different data files containing geometry and/or scene information. Using a library such as Assimp allows for accessing geometry much more complicated that what could reasonably be expected to be created programmatically.
- Before Assimp can be used the appropriate headers must be included.
// Using Assimp #include #include #include
Since each file type supported by Assimp stores different data and in a variety of different formats it is then Assimp’s responsibility to present this data in a unified and consistent manner. When loading data from an import file Assimp will automatically decipher what type of format it is stored in and then will load whatever data it can from the file. Once completed Assimp will then expose this data using a set of consistent interfaces. Once a file is loaded Assimp presents the host with a list of meshes containing each polygon mesh stored in the file, a list of materials for each material used in the file, a list of lights, a list of cameras and finally a hierarchy of objects found in the scene. Each of these objects has a mesh associated with it as well as various properties such as the objects transform. Each object can be parented to another object forming a hierarchy of objects. In this manner, it is possible for multiple objects to use the same mesh/material just with different attributes.
- Since the number of meshes/materials/objects etc. contained in an input file can change it is necessary to be able to dynamically load in the required number as needed. This requires creating some basic types used to represent each of the base objects exposed by Assimp. The first of which is a mesh file. Each mesh from Assimp can be used by multiple objects but only needs to be loaded once. To do this we will directly load each mesh into OpenGL using a VBO, IBO and a VAO to encapsulate the mesh data.
struct MeshData GLuint m_uiVAO; GLuint m_uiVBO; GLuint m_uiIBO; unsigned m_uiNumIndices; >;
- Now we have a mesh type we also need a material type. Assimp exposes many different variables that are used by various file formats to describe a material. For our purposes in this tutorial we know that the input file uses textures for each of its material parameters and has conveniently been made to have exactly the number of textures that we have used in the previous tutorial. As such we can describe each material using an OpenGL texture for each of the diffuse, specular and roughness parameters (Note: Most files loaded by Assimp are unlikely to expose data exactly like this however for our purposes we will assume that it will).
struct MaterialData GLuint m_uiDiffuse; GLuint m_uiSpecular; GLuint m_uiRough; >;
- We already have types that we use to represent point lights and camera data so the only remaining type is the object type. Each object has a mesh, material and transform associated with it. Instead of referencing existing mesh/material objects we will instead copy the data needed for rendering directly into the object type itself. This can be useful for simplifying things and increasing performance. As such each object needs the corresponding mesh VAO and number of indices required for the draw call. It also needs the texture IDs for the material data as well as a transform uniform used to hold its transform.
struct ObjectData GLuint m_uiVAO; unsigned m_uiNumIndices; GLuint m_uiDiffuse; GLuint m_uiSpecular; GLuint m_uiRough; mat4 m_4Transform; GLuint m_uiTransformUBO; >;
- Finally, we now need a type to hold the complete scene information. This requires holding the complete list of meshes, materials, lights, camera and objects. Since the number of each of these types are not known in advance it is necessary to use dynamically allocated lists in order to store them. Here we have used pointers for dynamic memory however those using C++ can also use a vector or equivalent to store the list as well as the number of elements.
struct SceneData MeshData * mp_Meshes; unsigned m_uiNumMeshes; MaterialData * mp_Materials; unsigned m_uiNumMaterials; ObjectData * mp_Objects; unsigned m_uiNumObjects; PointLightData * mp_PointLights; unsigned m_uiNumPointLights; GLuint m_uiPointLightUBO; LocalCameraData m_LocalCamera; GLuint m_uiCameraUBO; >;
- For convenience, we will wrap the scene loading code into its own function that we will call GL_LoadScene . This function will take in a string containing the file to load and a return used to pass the completed scene information object. The function will then return a Boolean signalling if loading was successful or not.
bool GL_LoadScene(const char * p_cSceneFile, SceneData & SceneInfo) // *** Add scene loading code here *** >
- Within the scene load function, we now need to start adding the code to import the scene file. Loading a file with Assimp is done through the aiImportFile function (Note: Assimp also provides a C++ class interface however this tutorial will use the C interface). This function takes as input the file name as well as a list of post processing options. These options control how Assimp will manipulate the data once loaded from the file so that it conforms with the host programs requirements. In this tutorial we will use aiProcess_Triangulate and aiProcess_SortByPType to ensure that only triangles are loaded. This is necessary as some formats can store high order polygons or even other geometry definitions altogether. We also use aiProcess_GenSmoothNormals to ensure that the meshes have normals with each vertex. We also add aiProcess_ImproveCacheLocality which causes Assimp to try and optimise the organisation of mesh index lists for best performance.
// Load scene from file const aiScene * p_Scene = aiImportFile(p_cSceneFile, aiProcess_GenSmoothNormals | aiProcess_CalcTangentSpace | aiProcess_Triangulate | aiProcess_ImproveCacheLocality | aiProcess_SortByPType); // Check if import failed if (!p_Scene) SDL_LogCritical(SDL_LOG_CATEGORY_APPLICATION, "Failed to open scene file: %s\n", aiGetErrorString()); return false; >
- In order to support loading files from other directories we will need to strip the directory path from the input file name. The example in this tutorial uses some basic C operation to strip the string after the last ‘/’ character. This can be performed using C++ string function or other available utilities if you wish.
// Get import file base path char * p_cPath = (char *)malloc(255); *p_cPath = '\0'; unsigned uiPathLength = 0; const char * p_cDirSlash = strrchr(p_cSceneFile, '/'); if (p_cDirSlash != NULL) uiPathLength = (unsigned)(p_cDirSlash - p_cSceneFile) + 1;; strncat(p_cPath, p_cSceneFile, uiPathLength); >
- Now the scene file has been loaded we now need to read in the data from Assimp and then load it into OpenGL. The first step is to load each mesh. Assimp stores meshes as index buffers with corresponding vertex buffers so we can just load these in using a VBO and IBO combination same as we have done previously. To do this we will first allocate enough memory in our list for each mesh and then loop over all meshes and load them.
// Allocate buffers for each mesh SceneInfo.mp_Meshes = (MeshData *)realloc(SceneInfo.mp_Meshes, p_Scene->mNumMeshes * sizeof(MeshData)); // Load in each mesh for (unsigned i = 0; i p_Scene->mNumMeshes; i++) MeshData * p_Mesh = &SceneInfo.mp_Meshes[i]; const aiMesh * p_AIMesh = p_Scene->mMeshes[i]; // Generate the buffers glGenVertexArrays(1, &p_Mesh->m_uiVAO); glGenBuffers(1, &p_Mesh->m_uiVBO); glGenBuffers(1, &p_Mesh->m_uiIBO); // Create the new mesh data p_Mesh->m_uiNumIndices = p_AIMesh->mNumFaces * 3; const unsigned uiSizeVertices = p_AIMesh->mNumVertices * sizeof(CustomVertex); const unsigned uiSizeIndices = p_Mesh->m_uiNumIndices * sizeof(GLuint); CustomVertex * p_VBuffer = (CustomVertex *)malloc(uiSizeVertices); GLuint * p_IBuffer = (GLuint *)malloc(uiSizeIndices); // *** Add code to load in vertex data here*** // *** Add code to load in index data here*** // *** Add code to bind VAO,VBA,IBO and fill buffers here *** // Cleanup allocated data free(p_VBuffer); free(p_IBuffer); // *** Add code to specify vertex attribute locations here *** ++SceneInfo.m_uiNumMeshes; >
- Assimp stores vertex position, normal and UV coordinates in separate lists. To use our existing geometry definition, we need to combine these values all together in a new vertex list. This just requires looping over Assimp’s internal position/normal/UV lists and creating a new CustomVertex type.
// Load in vertex data CustomVertex * p_vBuffer = p_VBuffer; for (unsigned j = 0; j p_AIMesh->mNumVertices; j++) p_vBuffer->v3Position = vec3(p_AIMesh->mVertices[j].x, p_AIMesh->mVertices[j].y, p_AIMesh->mVertices[j].z); p_vBuffer->v3Normal = vec3(p_AIMesh->mNormals[j].x, p_AIMesh->mNormals[j].y, p_AIMesh->mNormals[j].z); p_vBuffer->v2UV = vec2(p_AIMesh->mTextureCoords[0][j].x, p_AIMesh->mTextureCoords[0][j].y); ++p_vBuffer; >
- Assimp stores the indexes that we need in a list of ‘faces’. Each entry in the list corresponds to a face in the mesh and contains a list of indices for each vertex in that face. This index list can contain 3 or more entries per face however as we specified that Assimp should only load triangles then each face will only have 3 indices. We can just load each of these directly into out index buffer.
// Load in Indexes GLuint * p_iBuffer = p_IBuffer; for (unsigned j = 0; j p_AIMesh->mNumFaces; j++) *p_iBuffer++ = p_AIMesh->mFaces[j].mIndices[0]; *p_iBuffer++ = p_AIMesh->mFaces[j].mIndices[1]; *p_iBuffer++ = p_AIMesh->mFaces[j].mIndices[2]; >
- Now we have a complete vertex list stored in p_VBuffer and the corresponding index list stored in p_IBuffer . You should now add code to bind the p_Mesh ’s VAO and then bind and copy data for the VBO and IBO (a variable for each is already provided in MeshData ). This is done exactly to how we have done it in the previous tutorials. You will also then need to add the code to specify and enable the vertex attribute locations for each of the position, normal and UV coordinates.
- Now that we have loaded the meshes we can now load each of the scenes materials. This is done by looping over each of Assimp’s internal material definitions and then loading the required data into OpenGL. Assimp’s materials hold many different types of material information. For instance, things as simple as diffuse colour could be stored as a constant or a texture. For this tutorial, we will make the simplifying assumption that the input file stores materials using 3 different textures for each of the materials diffuse, specular and roughness values. Assimp allows for probing for these textures using the function aiGetMaterialTexture . This function takes as input the material, the type of material parameter to get the texture for and returns a string containing the file path of the associated texture (assuming a corresponding texture is available). We will then use this returned value, prepend the file path we determined previously and then use our existing KTX file loading function. (Note: Assimp textures can be in any possible texture format however the one provided for this tutorial uses KTX so we can use our existing image loading function). Before looping over each material, we must first allocate enough internal memory. We use realloc here as this allows for the scene load function to be called multiple times with each subsequent call adding to the existing list (This will work as long as the scene values are initialised to 0).
// Allocate buffers for each material SceneInfo.mp_Materials = (MaterialData *)realloc(SceneInfo.mp_Materials, p_Scene->mNumMaterials * sizeof(MaterialData)); // Load in each material for (unsigned i = 0; i p_Scene->mNumMaterials; i++) MaterialData * p_Material = &SceneInfo.mp_Materials[i]; // Generate the buffers glGenTextures(3, &p_Material->m_uiDiffuse); // Get each texture from scene and load aiString sTexture; aiGetMaterialTexture(p_Scene->mMaterials[i], aiTextureType_DIFFUSE, 0, &sTexture); strcpy(&p_cPath[uiPathLength], sTexture.data);// Add scene path to file GL_LoadTextureKTX(p_Material->m_uiDiffuse, p_cPath); // *** Add code to load specular and roughness textures here *** ++SceneInfo.m_uiNumMaterials; >
- The above example uses aiTextureType_DIFFUSE to return the filename of the diffuse texture. Add code into the specified location to also load in the specular and roughness textures by using the Assimp aiTextureType_SPECULAR and aiTextureType_SHININESS respectively.
- The next step is to loop through the scene hierarchy provided by Assimp and load in each object. This scene hierarchy is exposed by a simple root node. This node may store various objects itself and it may also have any number of child nodes. Each of these child nodes may have objects or other child nodes and so on. Since we don’t know how many nodes there are or what data is stored in each node the only way to find out is to loop through the hierarchy. To do this we will later create a function called GL_LoadSceneNode which we will pass the root node and it will then loop through the hierarchy and add objects to the list. To do this we must pass it our scene data storage type as well as Assimp’s scene type so that it can retrieve and store data as needed. Since Assimp forms a hierarchy of nodes, each node is affected by the attributes of its parent node such as transformations. As such we need to pass in the parent transformation at each step. Since at this point we are only passing the root node we can pass an identity matrix as the transform. As there is no way to know in advance how many objects are in the hierarchy we call the GL_LoadSceneNode function twice. The first time we pass a ‘false’ input which tells the function to loop over the hierarchy but not to add the objects and only return the number of objects found. We can then use this number to allocate enough space for our list and then call the function again this time allowing it to add objects (if using C++ style vectors this first step is not required).
// Allocate buffers for each object unsigned uiNumBackup = SceneInfo.m_uiNumObjects; GL_LoadSceneNode(p_Scene->mRootNode, p_Scene, SceneInfo, mat4(1.0f), false); SceneInfo.mp_Objects = (ObjectData *)realloc(SceneInfo.mp_Objects, SceneInfo.m_uiNumObjects * sizeof(ObjectData)); SceneInfo.m_uiNumObjects = uiNumBackup; // Reset // Load in each object GL_LoadSceneNode(p_Scene->mRootNode, p_Scene, SceneInfo, mat4(1.0f), true);
- Now we can load in the list of lights found in the scene. Assimp supports many different types of light (point, spot and direction) and so the Assimp light type has all possible combinations of attributes required to represent any of these light types. The actual light type is stored in the mType value. As so far, we have only used point lights we should only load in those by checking the type against aiLightSource_POINT . We can then loop over each internal light and then add it to the list as required by copying the Assimp lights attributes into our own light type. To do this we must first get the lights properties and then locate the light within Assimp’s scene hierarchy in order to determine the transformation being applied it. To do this we will later create a function called GL_FindSceneNode that can be used to search through the scene hierarchy and find the node whose name matches the search string. This will function similar to GL_LoadSceneNode except that it searches for a specific node and can be used to return the required node transformation. The only remaining thing that needs checking is the constant falloff value of the light attenuation, if this has a value of 0 than it needs to be set to 1. This will prevent issues with light falloff actually increasing when the distance to the light is less than 1.
// Allocate buffers for each light SceneInfo.mp_PointLights = (PointLightData *)realloc(SceneInfo.mp_PointLights, p_Scene->mNumLights * sizeof(PointLightData)); // Load in each light for (unsigned i = 0; i p_Scene->mNumLights; i++) const aiLight * p_AILight = p_Scene->mLights[i]; mat4 m4Ret(1.0f); GL_FindSceneNode(p_Scene->mRootNode, p_AILight->mName, p_Scene, m4Ret, m4Ret); if (p_AILight->mType == aiLightSource_POINT) // Get point light PointLightData * p_Light = &SceneInfo.mp_PointLights[SceneInfo.m_uiNumPointLights]; vec3 v3Position = vec3(p_AILight->mPosition.x, p_AILight->mPosition.y, p_AILight->mPosition.z); p_Light->m_v3Position = (vec3)(m4Ret * vec4(v3Position, 1.0f)); p_Light->m_v3Colour = vec3(p_AILight->mColorDiffuse.r, p_AILight->mColorDiffuse.g, p_AILight->mColorDiffuse.b); // Divide linear and quadratic components by 2 to compensate for using a attenuation constant of 1 p_Light->m_v3Falloff = vec3((p_AILight->mAttenuationConstant == 0.0f) ? 1.0f : p_AILight->mAttenuationConstant, p_AILight->mAttenuationLinear / 2.0f, p_AILight->mAttenuationQuadratic / 2.0f); ++SceneInfo.m_uiNumPointLights; > >
- Now the light data has been added into SceneInfo.mp_PointLights you need to add the code to generate the light UBO (a variable for this UBO is already provided in SceneData ), bind it and then copy in the light data. A new UBO should only be generated if the existing UBO variable has a value of ‘0’. This is so the function can be called multiple times and a UBO will only be generated on the first call (i.e. when the UBO variable has default value of 0). However binding and updating the UBO should happen all the time. This code should be added in the location specified above.
- Assimp is capable of loading in a list of different camera attributes from any file format that supports storing this information. As we only need 1 camera we will just load the first camera available. As not many file formats store camera information we need to check if there actually is a camera. If there isn’t one available, then we should load some default values (here we can use the same values used in previous tutorials). When a camera is available we need to convert the information returned by Assimp into something usable by our application. Assimp stores a cameras position, view direction and up vector that can be directly used once the appropriate scene node transformation is applied to them. This can be done identically to the way we did it with loading lights by using the GL_FindSceneNode function. Once transformed the vectors must be normalized before use. Assimp however doesn’t expose a right vector so we must compute this from the cross product of the direction and up vectors. The values for FOV and the clip planes can be directly copied across. Assimp provides a camera aspect ratio but it will not be correct for the current window dimensions so we ignore it. Our camera however uses 2 axis angles used to represent its view angle for camera movement. These attributes are not exposed by Assimp so we need to use the existing orientation vectors to determine the corresponding angles. Since the dot product between 2 direction vectors is equal to the cosine of the angle between them we can use this to find the 2 required angles. We do this by calculating the dot product between the direction vector and the x-axis as well as the up vector and the y-axis to get the cosine of the angle between each vector and the corresponding axis. This gives us the cosine for the x and y angle respectively. Using an inverse cosine, we can then determine the required angle.
// Load in camera if (p_Scene->mNumCameras > 0) const aiCamera * p_AICamera = p_Scene->mCameras[0]; mat4 m4Ret(1.0f); GL_FindSceneNode(p_Scene->mRootNode, p_AICamera->mName, p_Scene, m4Ret, m4Ret); vec4 v4Position = vec4(p_AICamera->mPosition.x, p_AICamera->mPosition.y, p_AICamera->mPosition.z, 1.0f); SceneInfo.m_LocalCamera.m_v3Position = (vec3)(m4Ret * v4Position); // Assimp camera data requires normalizing before use vec3 v3Direction = normalize(vec3(p_AICamera->mLookAt.x, p_AICamera->mLookAt.y, p_AICamera->mLookAt.z)); v3Direction = normalize(mat3(m4Ret) * v3Direction); SceneInfo.m_LocalCamera.m_v3Direction = v3Direction; vec3 v3Up = normalize(mat3(m4Ret) * vec3(p_AICamera->mUp.x, p_AICamera->mUp.y, p_AICamera->mUp.z)); // Assimp doesnt have a right vector so we calculate from up and direction SceneInfo.m_LocalCamera.m_v3Right = cross(v3Direction, v3Up); // Use orientation vectors to calculate corresponding axis angles SceneInfo.m_LocalCamera.m_fAngleX = atan2(v3Direction.x, v3Direction.z); SceneInfo.m_LocalCamera.m_fAngleY = asin(-v3Direction.y); SceneInfo.m_LocalCamera.m_fMoveZ = 0.0f; SceneInfo.m_LocalCamera.m_fMoveX = 0.0f; SceneInfo.m_LocalCamera.m_fFOV = p_AICamera->mHorizontalFOV; SceneInfo.m_LocalCamera.m_fAspect = (float)g_iWindowWidth / (float)g_iWindowHeight; SceneInfo.m_LocalCamera.m_fNear = p_AICamera->mClipPlaneNear; SceneInfo.m_LocalCamera.m_fFar = p_AICamera->mClipPlaneFar; > else if (SceneInfo.m_uiCameraUBO == 0) // *** Add code to initialise camera with default values here *** > // *** Add code to create camera UBO here ***
- Add code to initialise the camera with default values (the same as used in previous tutorials) as required. Also, make sure to add code to generate the camera UBO (a variable for this UBO is already provided in SceneData ) only when the UBO hasn’t been generated before (i.e. still has an initial value of ‘0’).
- Finally, we should release the Assimp loader by calling aiReleaseImport and then clear up any memory that we allocated.
// Destroy the scene aiReleaseImport(p_Scene); free(p_cPath); return true;
- Next, we need to make the actual definition of the GL_LoadSceneNode function.
void GL_LoadSceneNode(const aiScene * p_Scene, SceneData & SceneInfo, const mat4 & m4Transform, bool bAddObjects) // *** Add code here *** >
- This function needs to loop over each node in the hierarchy and check if there are any meshes used in the node. If there are then each of those meshes needs to be converted into a scene object. Before this can be done the current transformation needs to be determined. This transform is a combination of the nodes current transform multiplied by the nodes parent transform. Since Assimp stores transforms in row-major order we need to transpose it so that it is in column-major order as required by OpenGL. Once each mesh has been added we then need to traverse each of the current nodes children. This is done by looping over any children and recursively calling the GL_LoadSceneNode function
// Update current transform mat4 m4CurrentTransform = transpose(*(mat4 *)&p_Node->mTransformation) * m4Transform; // Loop over each mesh in the node for (unsigned i = 0; i p_Node->mNumMeshes; i++) // Load in each nodes mesh as an object if (bAddObjects) ObjectData* p_Object= &SceneInfo.mp_Objects[SceneInfo.m_uiNumObjects]; // *** Add code to get mesh data here *** // *** Add code to get material data here *** // *** Add code to get transform and fill UBO here *** > ++SceneInfo.m_uiNumObjects; > // Loop over each child node for (unsigned i = 0; i p_Node->mNumChildren; i++) GL_LoadSceneNode(p_Node->mChildren[i], p_Scene, SceneInfo, m4CurrentTransform, bAddObjects); >
- Each Assimp node contains a list of meshes found in that node in mMeshes . We can loop over this list and get each mesh. This mesh is stored as an index into the mesh list. Since we loaded meshes from the mesh list using the same ordering we can use this index to directly map into our own list in order to retrieve the corresponding mesh information. We then make a copy of this in our object.
// Get data from corresponding mesh const MeshData * p_Mesh = &SceneInfo.mp_Meshes[p_Node->mMeshes[i]]; p_Object->m_uiVAO = p_Mesh->m_uiVAO; p_Object->m_uiNumIndices = p_Mesh->m_uiNumIndices;
- Each Assimp mesh stores a pointer to the material that is assigned to it. We can use the mesh index to retrieve the corresponding Assimp mesh and then retrieve its material index. Just like for meshes the material index can be used to directly index our own material list and retrieve the corresponding material. We will then copy the required rendering data into our object.
// Get data from corresponding material const MaterialData * p_Material = &SceneInfo.mp_Materials[p_Scene->mMeshes[p_Node->mMeshes[i]]->mMaterialIndex]; p_Object->m_uiDiffuse = p_Material->m_uiDiffuse; p_Object->m_uiSpecular = p_Material->m_uiSpecular; p_Object->m_uiRough = p_Material->m_uiRough;
- Finally add the code to copy the current node transform m4CurrentTransform into the object and then generate, bind and fill the objects UBO using the same techniques as previous tutorials.
- Next, we need to make the actual definition of the GL_FindSceneNode function.
bool GL_FindSceneNode(aiNode * p_Node, const aiString & Name, const aiScene * p_Scene, const mat4 & m4Transform, mat4 & m4RetTransform) // *** Add code here *** >
- This function needs operate similar to GL_LoadSceneNode by looping over each node in the hierarchy except that at each node it checks to see if it matches the search name. If it does match, then the node transformation should be returned. Before this can be done the current transformation needs to be determined. This transform is a combination of the nodes current transform multiplied by the nodes parent transform and so on and can be calculated in an identical manner to GL_LoadSceneNode .
// Update current transform mat4 m4CurrentTransform = transpose(*(mat4 *)&p_Node->mTransformation) * m4Transform; if (strcmp(p_Node->mName.data, Name.data) == 0) m4RetTransform = m4CurrentTransform; return true; > // Loop over each child node for (unsigned i = 0; i p_Node->mNumChildren; i++) bool bRet = GL_FindSceneNode(p_Node->mChildren[i], Name, p_Scene, m4CurrentTransform, m4RetTransform); if (bRet) return true; > > return false;
- Now we have a function to load a scene from a file into our SceneData data we should also write a function that cleans up when the scene data should unload. To do this we will create a new function called GL_UnloadScene . This function will simply loop through the list of meshes and then release the mesh VAO’s, VBO’s and IBO’s. It will then loop through the material list and release each of the associated textures. It should then release the light and camera UBO before deallocating the memory used to store each list.
void GL_UnloadScene(SceneData & SceneInfo) // Delete VBOs/IBOs and VAOs for (unsigned i = 0; i SceneInfo.m_uiNumMeshes; i++) glDeleteBuffers(1, &SceneInfo.mp_Meshes[i].m_uiVBO); glDeleteBuffers(1, &SceneInfo.mp_Meshes[i].m_uiIBO); glDeleteVertexArrays(1, &SceneInfo.mp_Meshes[i].m_uiVAO); > free(SceneInfo.mp_Meshes); // Delete materials for (unsigned i = 0; i SceneInfo.m_uiNumMaterials; i++) glDeleteTextures(3, &SceneInfo.mp_Materials[i].m_uiDiffuse); > free(SceneInfo.mp_Materials); // Delete objects for (unsigned i = 0; i SceneInfo.m_uiNumObjects; i++) glDeleteBuffers(1, &SceneInfo.mp_Objects[i].m_uiTransformUBO); > free(SceneInfo.mp_Objects); // Delete light UBO glDeleteBuffers(1, &SceneInfo.m_uiPointLightUBO); free(SceneInfo.mp_PointLights); // Delete camera UBO glDeleteBuffers(1, &SceneInfo.m_uiCameraUBO); >
Part 3: Rendering a loaded scene
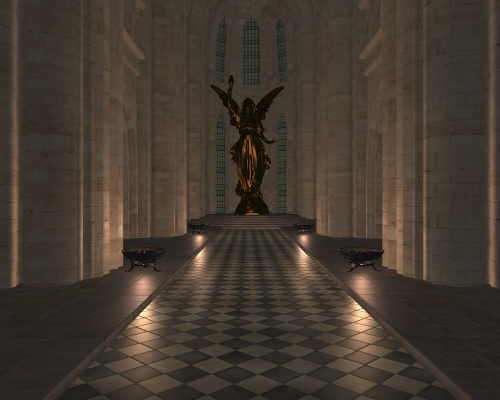
- We can now use our newly created functions to load in scene data. We can now update the initialise function to use the scene load function. We will use the same shader code as last tutorial so all that needs to be done is to load the scene data into a new SceneData variable. Provided with this tutorial is an entire scene stored in the ‘.fbx’ file format. This file format is useful as it allows for storing lights and camera data along with meshes and materials. After the load function, we then bind the camera and light UBO created in GL_LoadScene to the shaders corresponding binding locations and then update the number of lights uniform.
// Declare OpenGL variables GLuint g_uiMainProgram; SceneData g_SceneData = <>;
// Load in scene from file if (!GL_LoadScene("Cathedral/TutorialCathedral.fbx", g_SceneData)) return false; > // Bind camera UBO glBindBufferBase(GL_UNIFORM_BUFFER, 1, g_SceneData.m_uiCameraUBO); // Bind light UBO glBindBufferBase(GL_UNIFORM_BUFFER, 2, g_SceneData.m_uiPointLightUBO); // Set number of lights glProgramUniform1i(g_uiMainProgram, 0, g_SceneData.m_uiNumPointLights);
- Now modify the clean-up function so that it calls GL_UnloadScene to free the scene data.
- Next modify the update and main functions so that any reference to camera data now uses the LocalCameraData variable stored inside g_SceneData .
- Now we can modify the render function to add the code that is required to render the loaded scene. This just requires looping over each object in the object list and then using the objects member attributes to set the current OpenGL state.
// Loop through each object for (unsigned i = 0; i g_SceneData.m_uiNumObjects; i++) const ObjectData * p_Object = &g_SceneData.mp_Objects[i]; // Bind VAO glBindVertexArray(p_Object->m_uiVAO); // Bind the Transform UBO glBindBufferBase(GL_UNIFORM_BUFFER, 0, p_Object->m_uiTransformUBO); // Bind the textures to texture units glActiveTexture(GL_TEXTURE0); glBindTexture(GL_TEXTURE_2D, p_Object->m_uiDiffuse); glActiveTexture(GL_TEXTURE1); glBindTexture(GL_TEXTURE_2D, p_Object->m_uiSpecular); glActiveTexture(GL_TEXTURE2); glBindTexture(GL_TEXTURE_2D, p_Object->m_uiRough); // Draw the Object glDrawElements(GL_TRIANGLES, p_Object->m_uiNumIndices, GL_UNSIGNED_INT, 0); >
- Ensure the supplied ‘.fbx’ scene file and corresponding textures are copied to your output executable directory. You should now be able to run your program and view the results.
Copyright © 2016-2021 Matthew Oliver. Distributed by an GFDL license.
